Drying FB Papers
Printing on FB (fibre-based) paper comes with some extra challenges, one of which is getting the final print nicely flat.
(For the uninitiated, ‘fibre-based’ is a roundabout way of saying ‘actual paper’; the alternative is ‘resin coated’, where the paper base is either coated in plastic (polythene) on both sides, or is made of plastic altogether.)
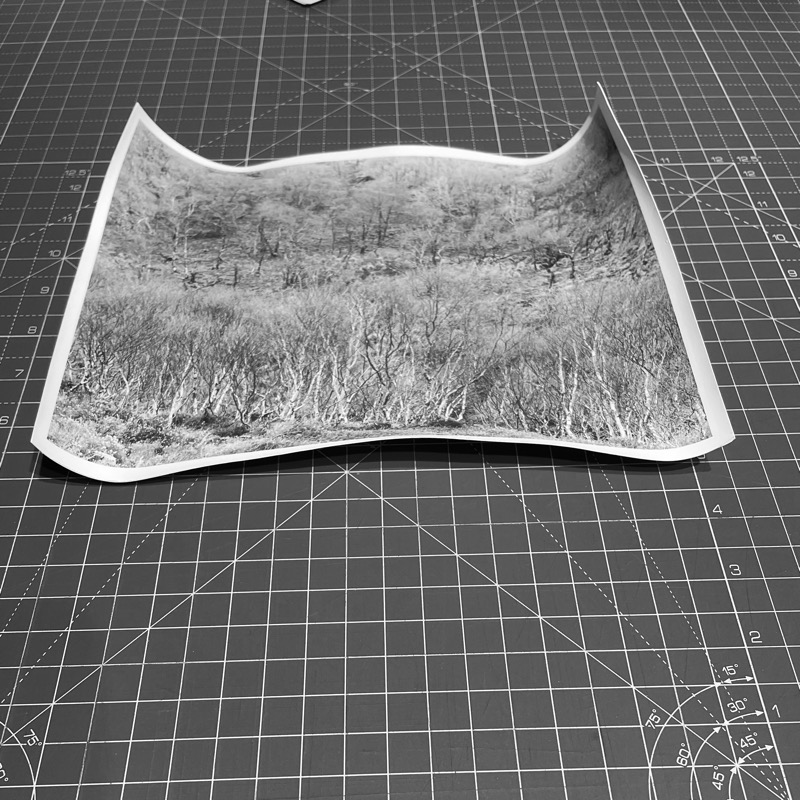
The natural paper base of FB paper absorbs water, and with it the processing chemicals, which then need to be washed out. The washing takes quite a long time, meaning that by the time it is finished, the base is thoroughly saturated with water. This then makes the paper slow to dry, and, perhaps most annoyingly of all, as it dries it curls:
There are different ways of dealing with the curling, not all which work (notably, the oft recommended ‘hang two sheets back to back’ technique doesn’t work — FB papers should never be hung, as gravity draws water downwards, so the top of the paper dries much faster than the bottom, causing the paper to deform).
To fix the curl, there is usually some form of pressing involved. Cold pressing can provide satisfactory results even with a makeshift homemade press, but the pressure needs to be quite high (a few books is not enough) and it is time-consuming (I found it necessary to press prints this way for at least two weeks for acceptable results).
Hot pressing is a faster option, but it requires more specialist equipment to invest into (though I know an accomplished photographer with decades of experience who swears by a shirt press at a very low setting).
There is, however, a very simple technique, that seems particularly popular on the Continent, and that prevents the paper from curling in the first place by simply taping it up to a sheet of glass. It works extremely well, in fact, the dried print doesn’t even have the slight curl the paper sheet has out of the box!
Instructions:
-
After removing the print from the wash and briefly dripping it off, place it emulsion down on a clean sheet of glass, and use a large squeegee to get rid off excess water by running it across left to right and top to bottom a couple of times.
-
Place the print on a drying rack and leave it to dry off for about 10-15min, just so long so it doesn’t start to curl (NB: this step is essential).
-
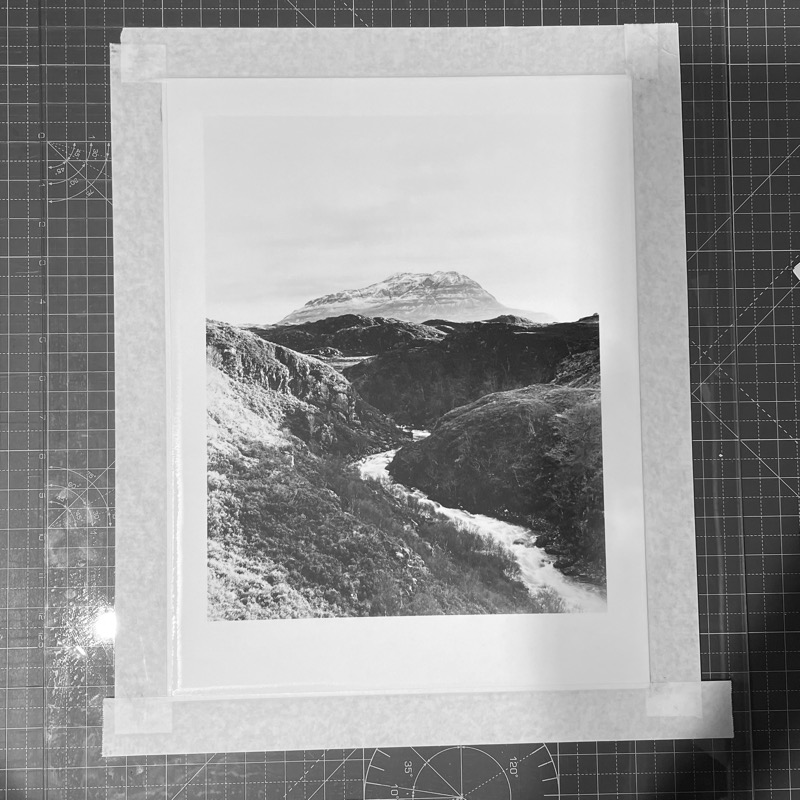
Place the print face up on a sheet of clean toughened glass.
-
Tape the print to the glass along the edges using an old-fashioned gummed (i.e., water-activated) tape. Only a small overlap with the print is needed, no more than 1/8” (3mm). After the initial placement, run a nail around the edge to get a nice sharp bend, and then repress the tape back on the paper, wiping off excess water with a bit of clean cloth.
-
Make sure the paper is well pressed on the glass as well.
-
Repeat on all four sides:
-
Check on the print after about 15min — if any of the tape shows signs of coming off, it can be simply rewetted with a wet cloth from above and re-fixed (but this only happens when step no. 2 was skipped, or the tape wasn’t properly wetted in the first place),
-
Leave the print to dry fully; this takes around 12-24 hours depending on temperature (and about 50% longer than when drying it on a rack); if in doubt, leave it a bit longer, it needs too be completely dry before removing it.
-
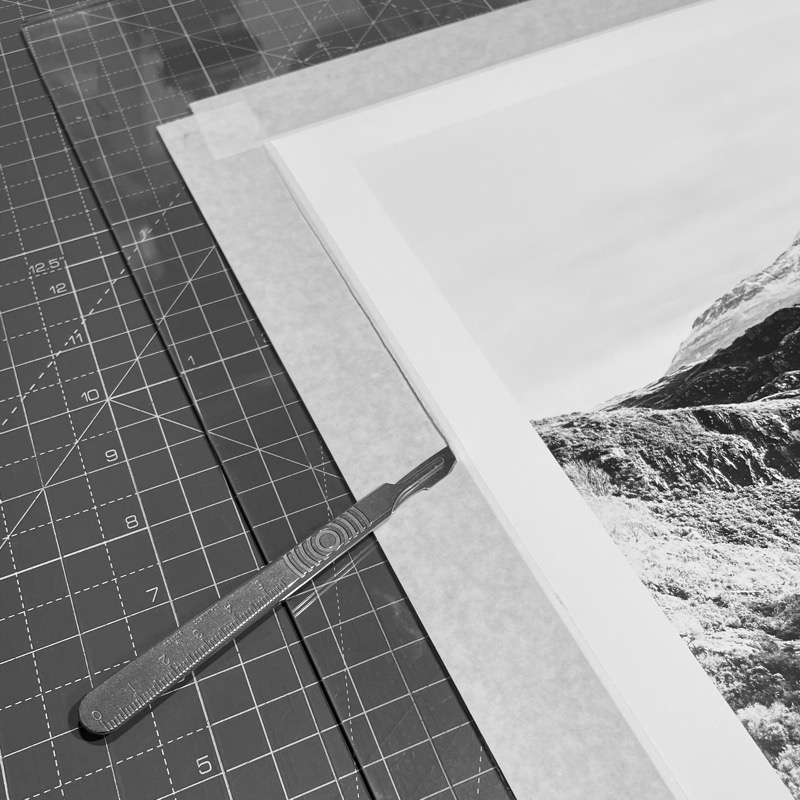
Using a sharp blade, such as a scalpel, cut through the tape just outside of the print edge, slicing underneath the print, and remove the print from the glass:
-
Trim the edges of the print to get rid of the taped bits.
Notes:
-
Using ordinary glass is not recommended; not only it is far too easy to break while handling it, but unless it is quite thick, it will crack under the drying forces. I use toughened glass sheets meant for a greenhouse; nowadays greenhouses have gone polycarbonate, but your local glassier might have some left over from the old days and will be keen to get rid off them. In any case, you can get toughened glass made to measure,
-
Using the right tape is the key to success. About 1.5” (36mm) seems ideal to give good grip on the glass, it needs to be well gummed, and the glue should be starch-based. You can find gummed tape at the usual online marketplaces, but given you are going through the hassle of using FB paper in the first place, you might want to use a tape of conservation standard. In the UK suitable tape that works well for this task can be got cheaply from Lion.
-
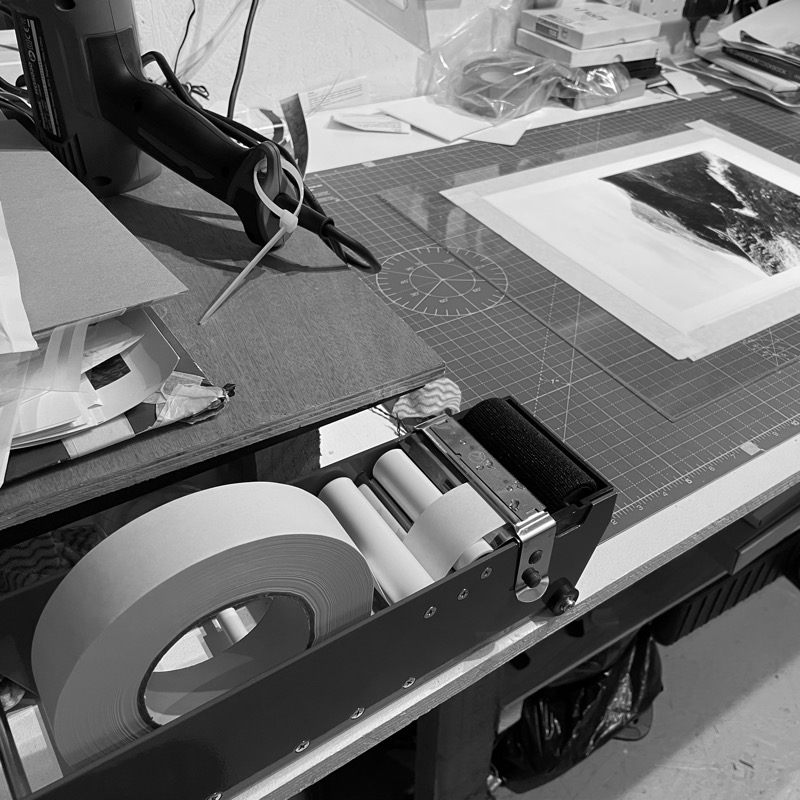
The tape needs to be well wetted, this process generally fails because it was not, but this can quickly become quite messy — working with a gummed tape is made much easier by using a dispenser, such as this one from Lion; placing it at the edge of a cutting board makes it easy to measure out the right length:
-
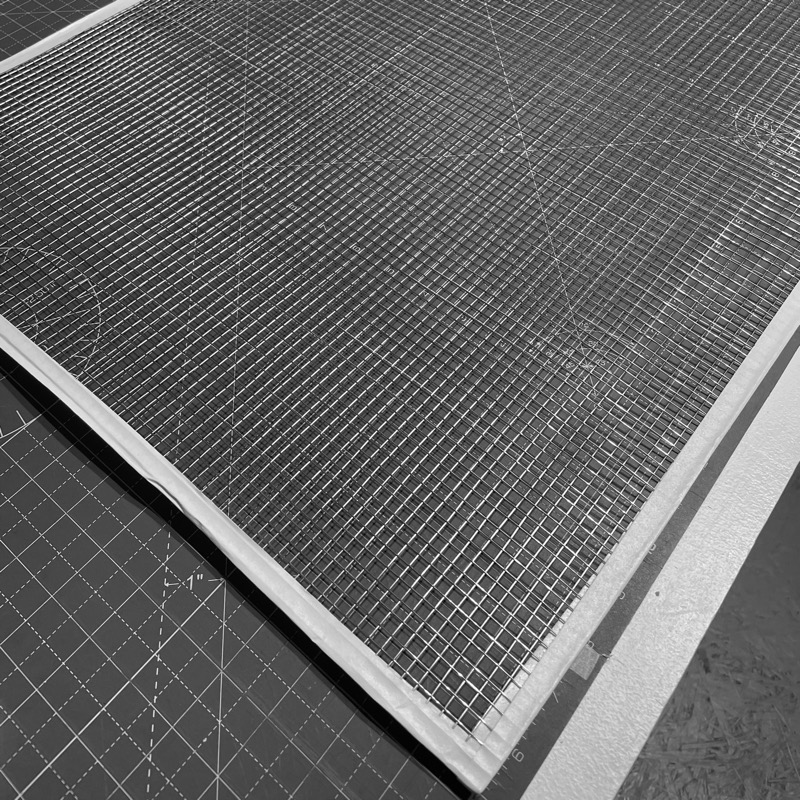
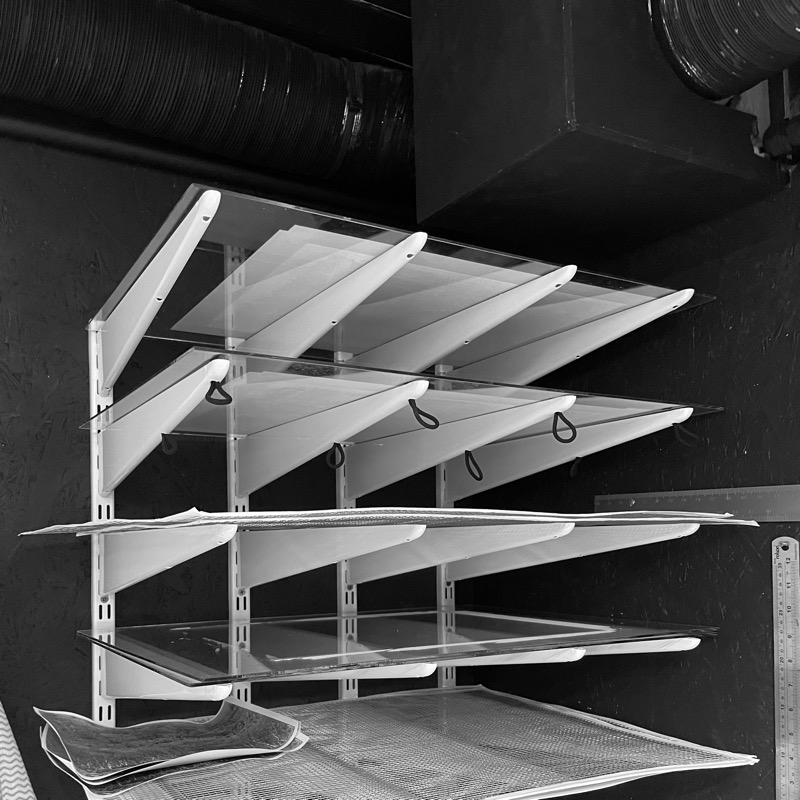
Drying racks are easy to make, and can be a real space saver in small darkroom regardless of what paper you print on. I just use marine-grade stainless steel mesh I got from a solar panel shop, finished off with some tape to cover up the sharp edges. These are then placed on some modular shelving brackets: