Mounting Prints using T-hinge
A well chosen mount can really bring out the qualities of a good print; conversely, an unsuitable mount can completely ruin it. A poor quality mount board can also physically damage a print and / or foreshorten its life span. For these I consider the mounting of my own prints worth it.
General Considerations
A few things worth keeping in mind regardless who will end up mounting your prints and how:
-
Life becomes much simpler if you settle on a standardised set of mount sizes for your prints; producing different photographs at different crop ratios is tempting, but it makes mounting much more complex, particularly if you want to produce a larger, yet consistent, body of work,
-
The mount should use board of a conservation standard; however, this type of board is very hard, and consequently difficult to cut well at home with basic tools, so having it professionally cut is often the best, and most cost-effective, option,
-
The mount tone needs to match the paper and process; in particular even a very slightly warm toned B&W print placed in an ice white mount will not look right (generally speaking ice white board, which is the most common ‘white’ on offer both in galleries and online, makes a poor choice for handmade silver gelatine prints — if you are ordering mounts online, get a board sampler from the vendor first),
-
Flawless mount board is virtually impossible to find nowadays, but if the board has a slight texture to it, it is often possible to scrape off tiny flaws with a scalpel without it being noticeable, but you will not get away with this on a smooth board,
-
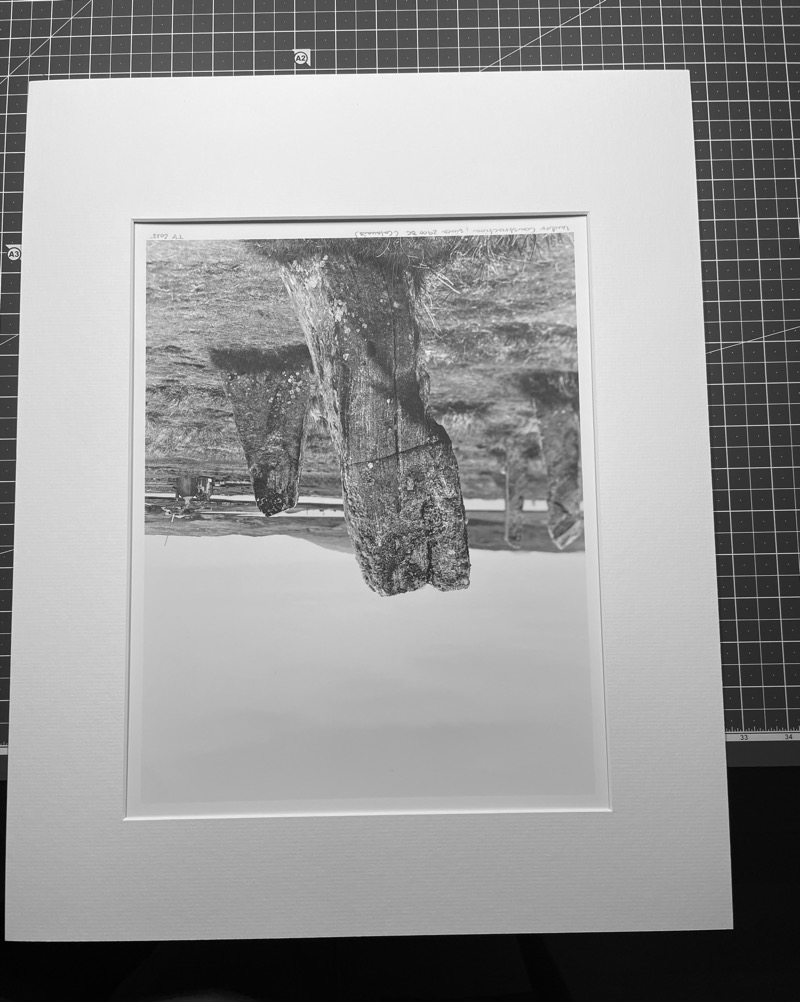
My personal preference is to mount so as to show around 3/8” of the paper border, as this allows the print title and signature to be visible (which I am told folk into buying prints prefer), but doing so requires the print easel and the mount cut to be perfectly right angled and their dimensions to be correct — if you are moving between different easel settings while printing, it is really easy to mess this up,
-
Ultimately, mount is a subjective thing, and whoever ends up with the print might very well prefer something different because of taste / location / type of frame, so the mounting technique should allow for the print to be easily remounted in a mount of the owner’s choice.
Mounting Fibre Based Paper
Fibre based photographic paper (aka real paper without plastic coating), is an organic material that will expand / contract in response to changes of temperature and humidity. The mounting technique needs to take this into an account, to avoid the print deforming.
The one thing to avoid is to simply tape the print all around its edges onto either the backboard or the mount itself. If you do that, you will discover that over time this will cause the print to buckle inside the mount.
One option is to glue the whole of the print onto the backboard so it cannot move at all independently of it; doing so in a way that doesn’t compromise the life of the print (aka dry mounting) requires special mounting film and a heated press, so it’s not well suited to small home workflows, but for me the biggest drawback is that the print can’t be removed from that original backing material no matter what.
A technique that is used in museums to mount prints considered too valuable to modify at all is to use mounting corners. When I was growing up, our family albums were done this way (my mother was a professional photographer, and the idea of any sort of a glue being use on photographs was an anathema to her), and I can’t get over the memories of photographs falling out from these. Of course, corners under a mount are a whole different thing than those in an album that you leaf through, but I can’t get past those memories regardless.
T-Hinge Mounting
The option that I have settled on is to hinge mount prints using a good quality gummed paper tape. It’s a technique that I find simple enough, it allows the print to hang freely inside the mount, and, if necessary, the print can be removed easily enough from the mount.
The tools:
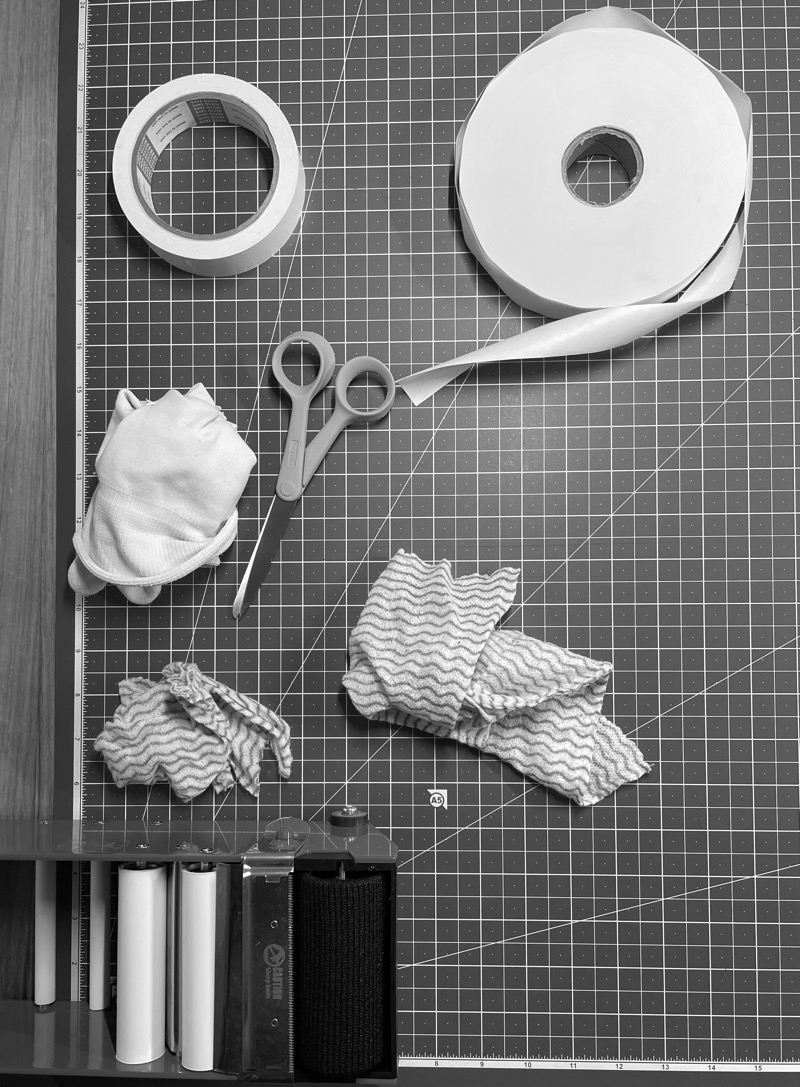
-
A suitable conservation standard white gummed tape about 1” in width; the glue should be starch-based,
-
A bit of some low adhesion self-adhesive tape (e.g., 3M low adhesion masking tape, purple in colour, works quite well, as does pressure activated conservation tape, without the big pressure applied),
-
Scissors, cotton gloves, a couple of bits of clean cloth, one dry for use on the mount, and one damp for wiping off glue from hands,
-
A wet sponge for tape wetting (I use the roller on my gummed tape dispenser),
-
A ruled cutting mat to work on, it makes things easier to place evenly without using a ruler,
-
Two quite bright lights for side-lighting the work space.
The Process:
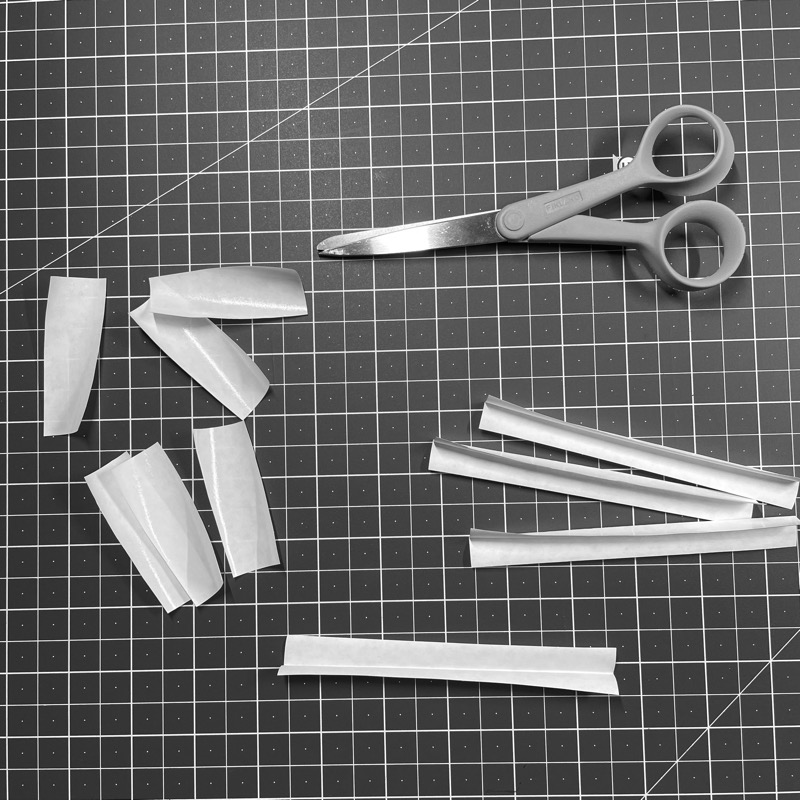
While my hands are still completely dry, I pre cut all the tape I’ll need:
The hinge tape: for 16x12 prints I use three hinges made of two 2.5” long bits of tape each,
Four bits of tape 5” long for closing the mount; these get folded in the middle along their length, with the glue facing out,
Four tabs of the low adhesion tape about 1” long:
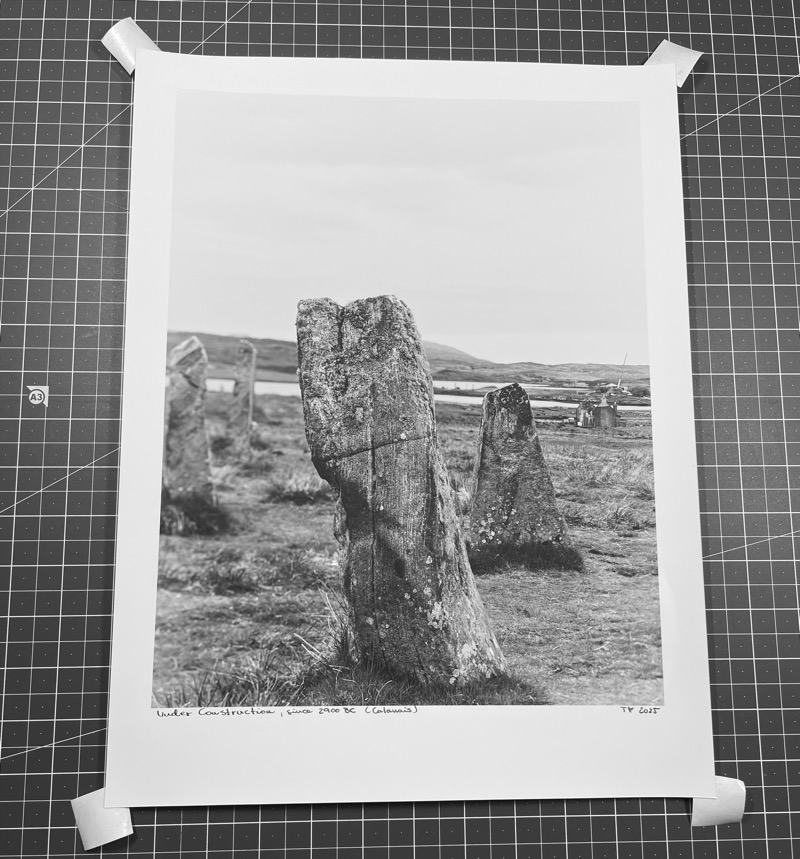
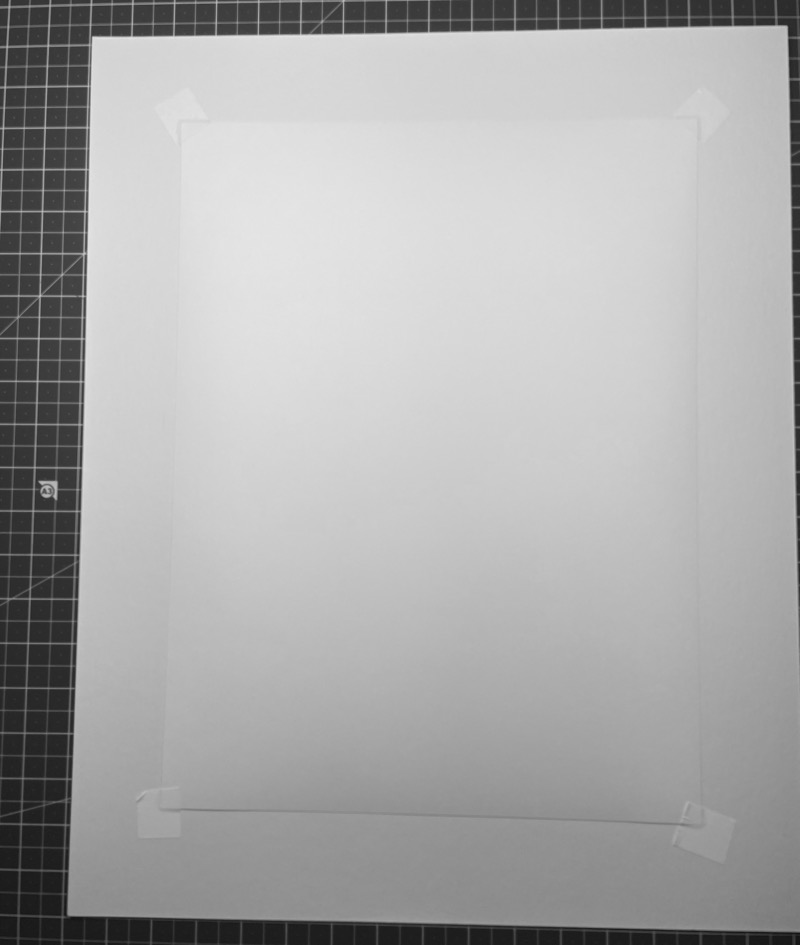
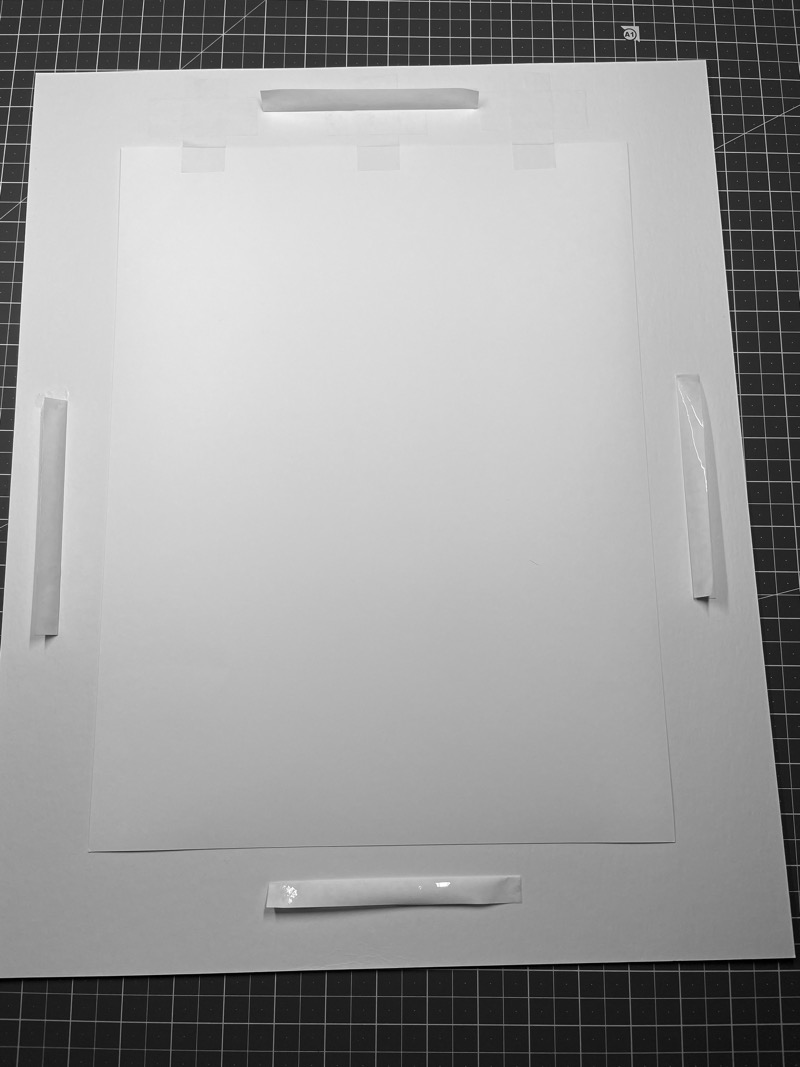
I place the print on the working surface face up, and attach the four low adhesion bits of tape to the corners from below, with the sticky side up,
I carefully position the mount onto the print; this can take a couple of attempts, and is much easier to do if the edges of the mount don’t cast shadows underneath themselves into the print, so I use two bright side lights positioned so as to force the shadows underneath and beyond the edges of the mount,
With the mount in a satisfactory position, I press lightly on it around where the corner tabs are underneath to make them stick better, then slide the top edge of the print over the edge of the table, and firmly press the two top corner tabs on the board with gloved hands,
Holding my thumbs underneath the tabs for extra support I flip the mount over, so the print is face down; sometimes the bottom tabs come off while doing this, but as long as the top hasn’t moved, this is fine, either way I press all four tabs firmly on,
If in doubt that the print didn’t move during the initial flip, this is a good time to double check,
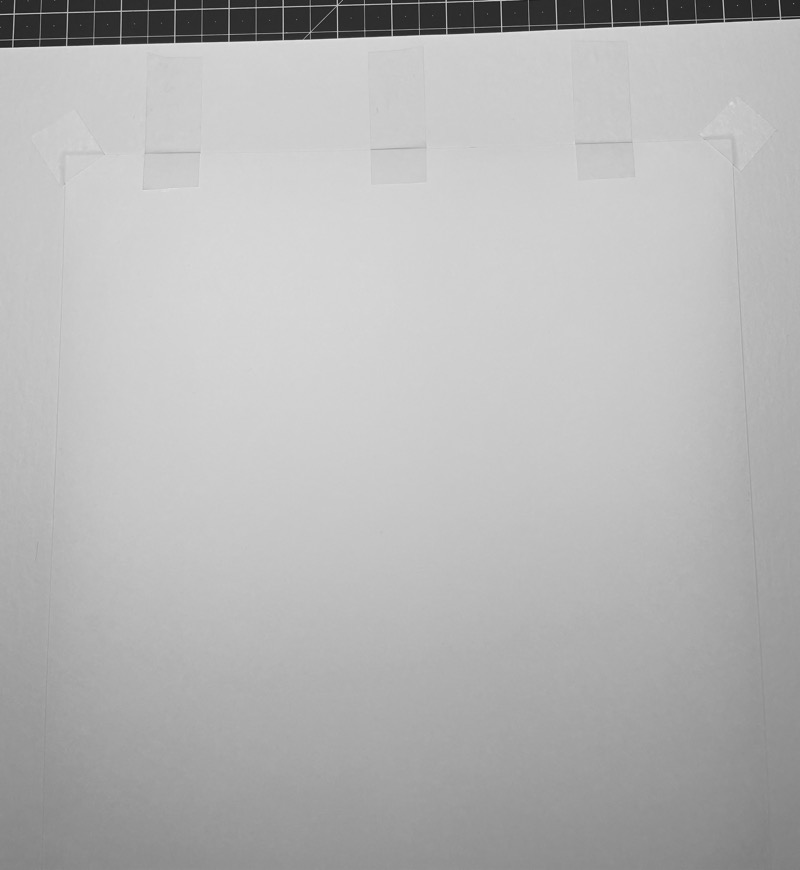
I stick on the tree bits of gummed tape forming the hinges, evenly spaced along the top edge; the tape needs to be well wetted, when using the dispenser roller, I run it across at 45 degree angle, and then again rotated 90 degrees. I then press it well both onto the print and the board with the dry cloth,
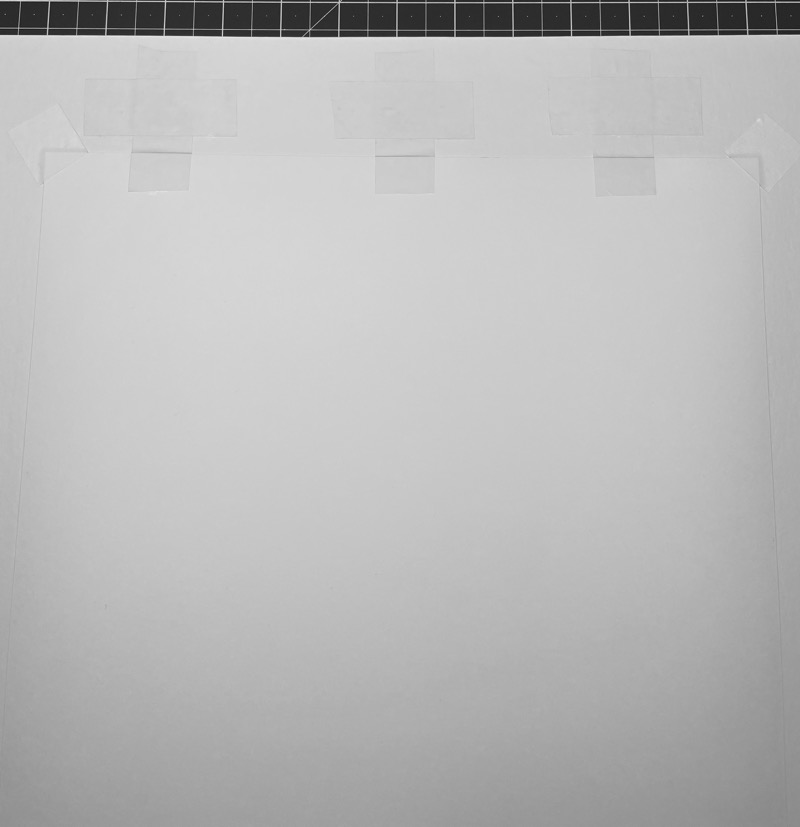
I apply the three remaining bits across the top of the hinge tape to form the T-bar; the reason for doing this is to strengthen the bond between the hinge and the board, as the hard conservation board doesn’t absorb water easily, so the bond is not as strong as with the print base,
I very carefully remove the tabs holding the corners,
To close the mount, I thoroughly wet both sides of each of the folded 5” bits of tape and place them on the mount with the fold facing inwards, starting at the top; this needs to be done without hanging about as the folded tape starts to unfold, which makes it harder to place the backing board on,
I place the backing board on; if the top tape is too much open, a slight forward movement helps to bend it back again before pressing the board onto the mount (the initial position doesn’t have to be absolutely perfect, as the back board can be shifted by a small amount easily enough at this stage),
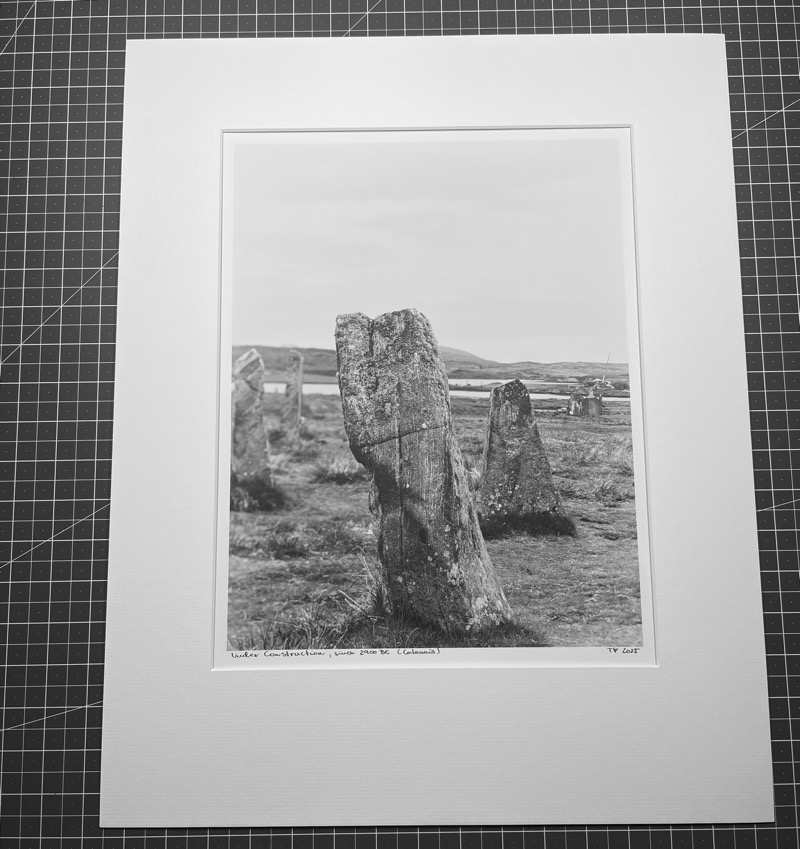
I flip the print face up and place the mount cutout back in (if you don’t have it, that’s ok), then I put the whole thing between two sheets of glass and weight it down with a heavy book,
I leave it sit like this for a couple of days to allow it to dry out completely, then remove the cut out before putting the print into a cellophane bag.

If the print ever needs to be removed from the mount, the hinge tape can simply be sliced through along the top edge, and either left on, or carefully wetted until it can be peeled off.